Dockerfile.
Before continuing, make sure you have:
- A Bun application ready for deployment
- A DigitalOcean account
- DigitalOcean CLI installed and configured
- Docker installed and added to your
PATH
Create a new DigitalOcean Container Registry
Create a new Container Registry to store the Docker image.You should see the new registry in the DigitalOcean registry dashboard: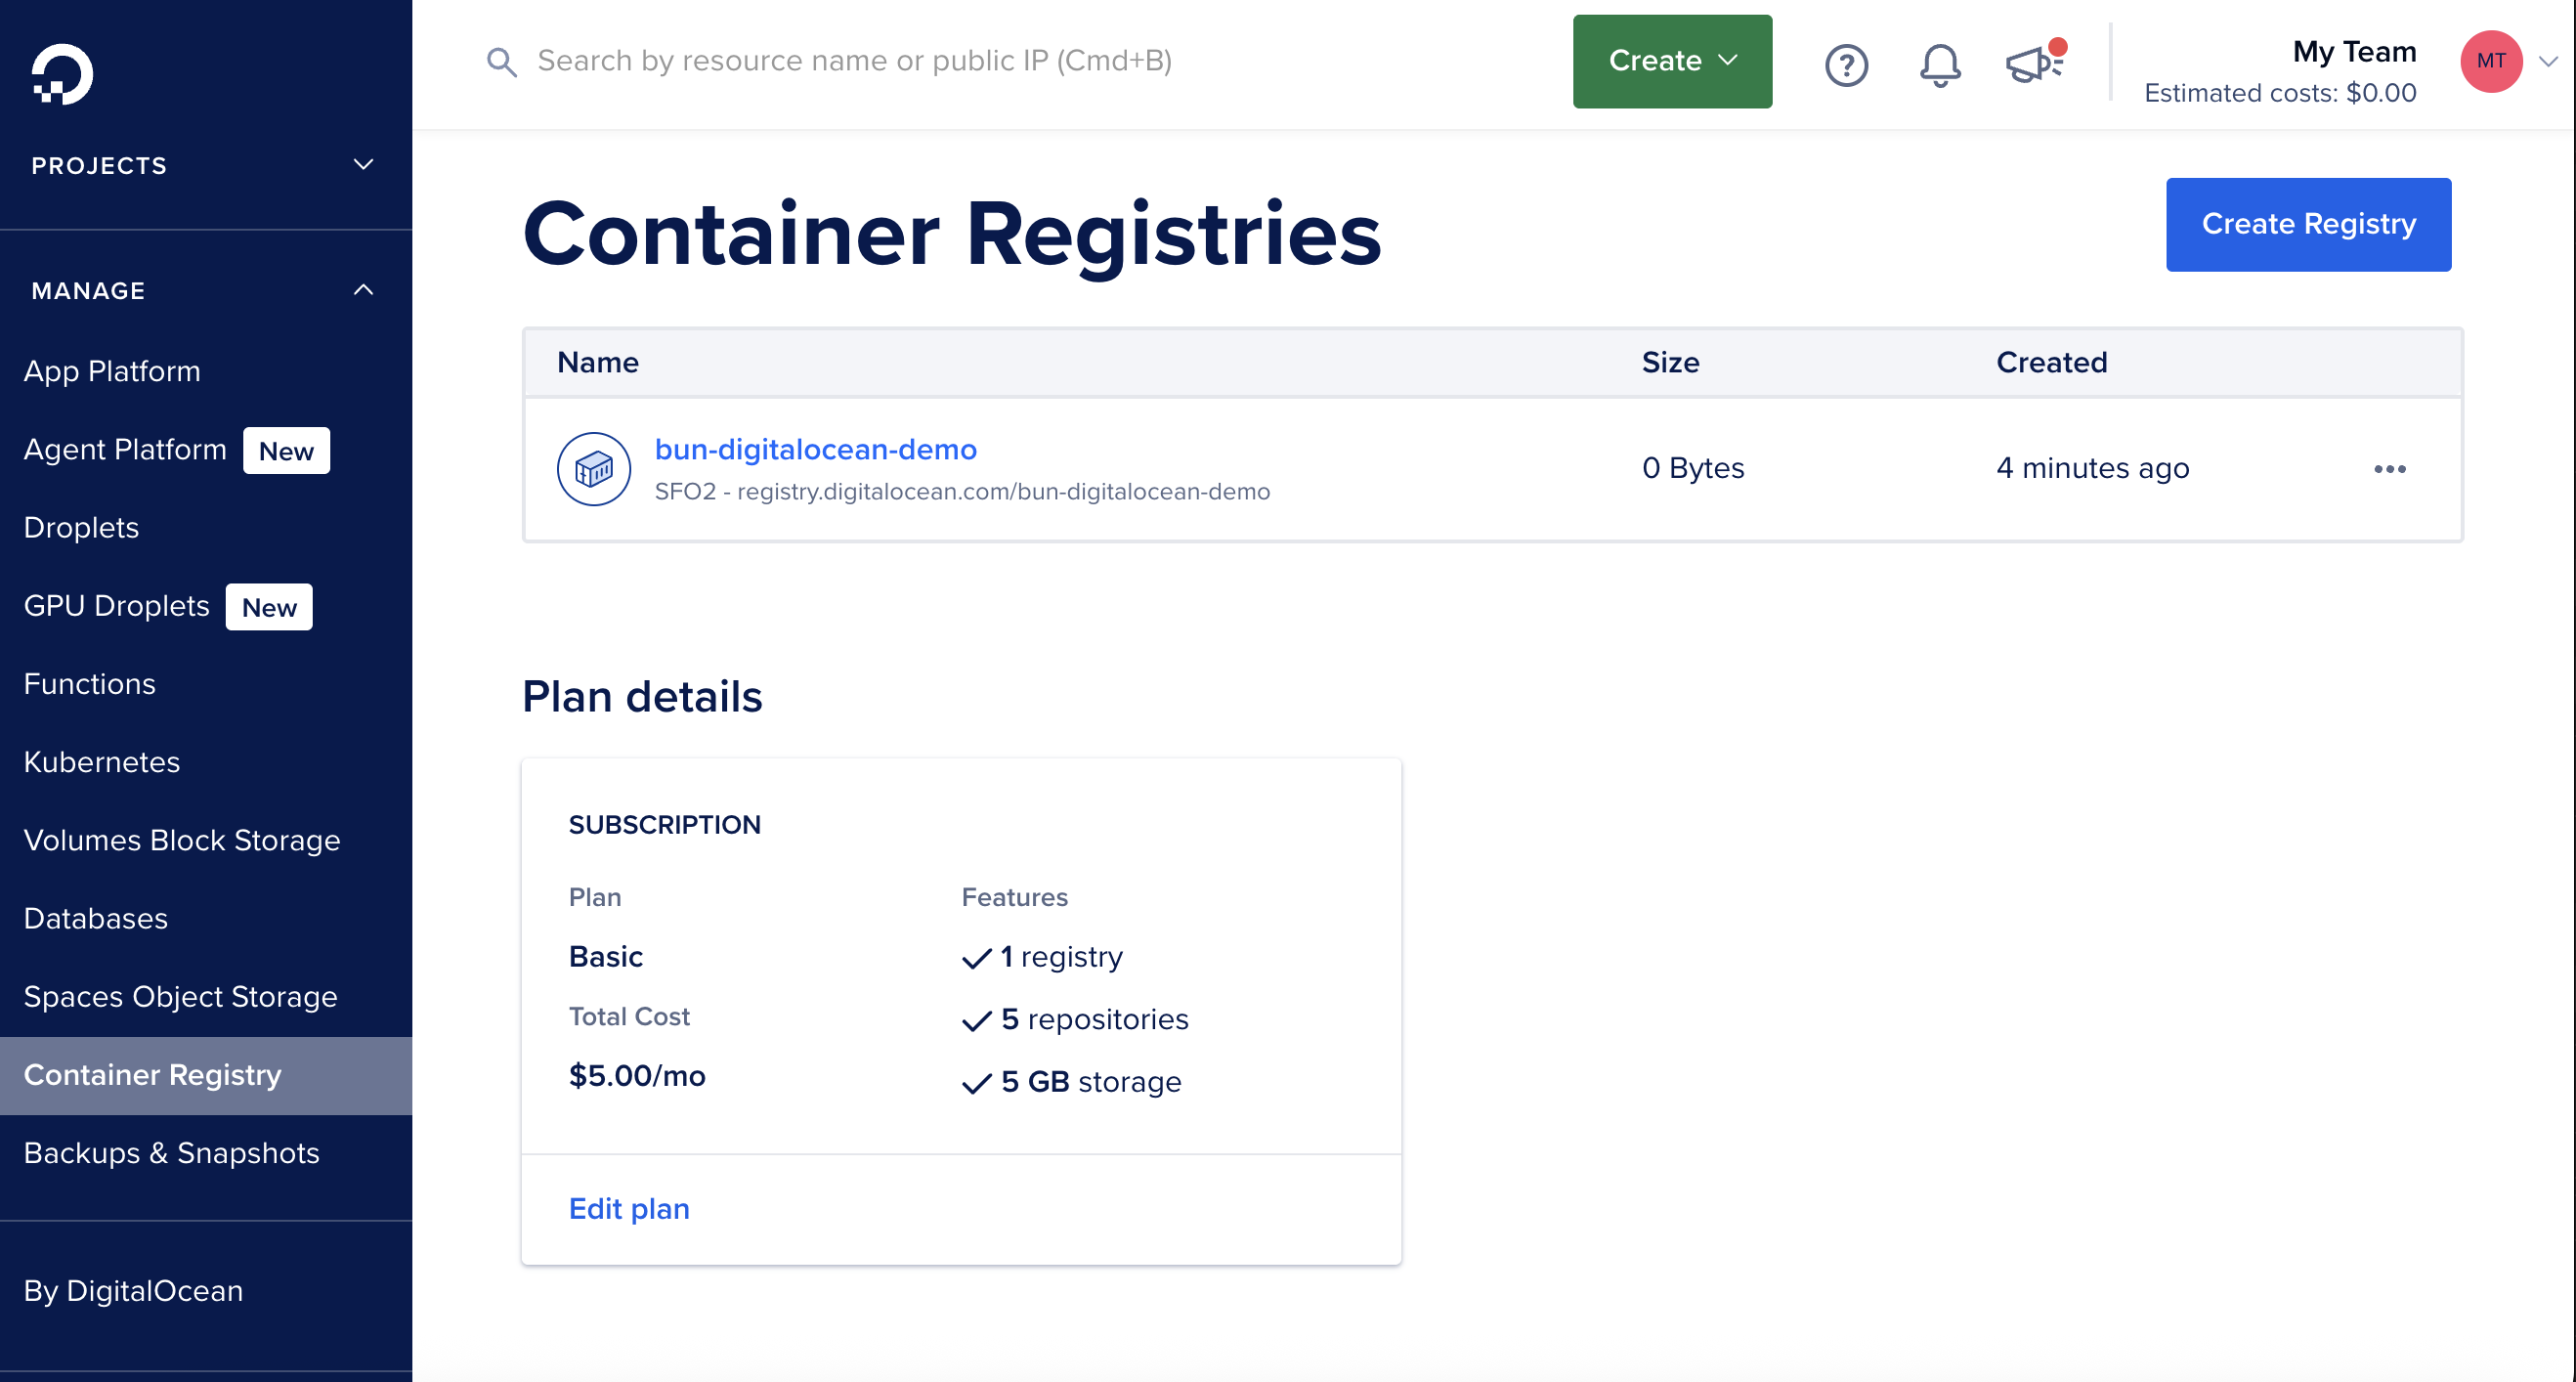
- Through the DigitalOcean dashboard
- Through the DigitalOcean CLI
In the DigitalOcean dashboard, go to Container Registry, and enter the details for the new registry.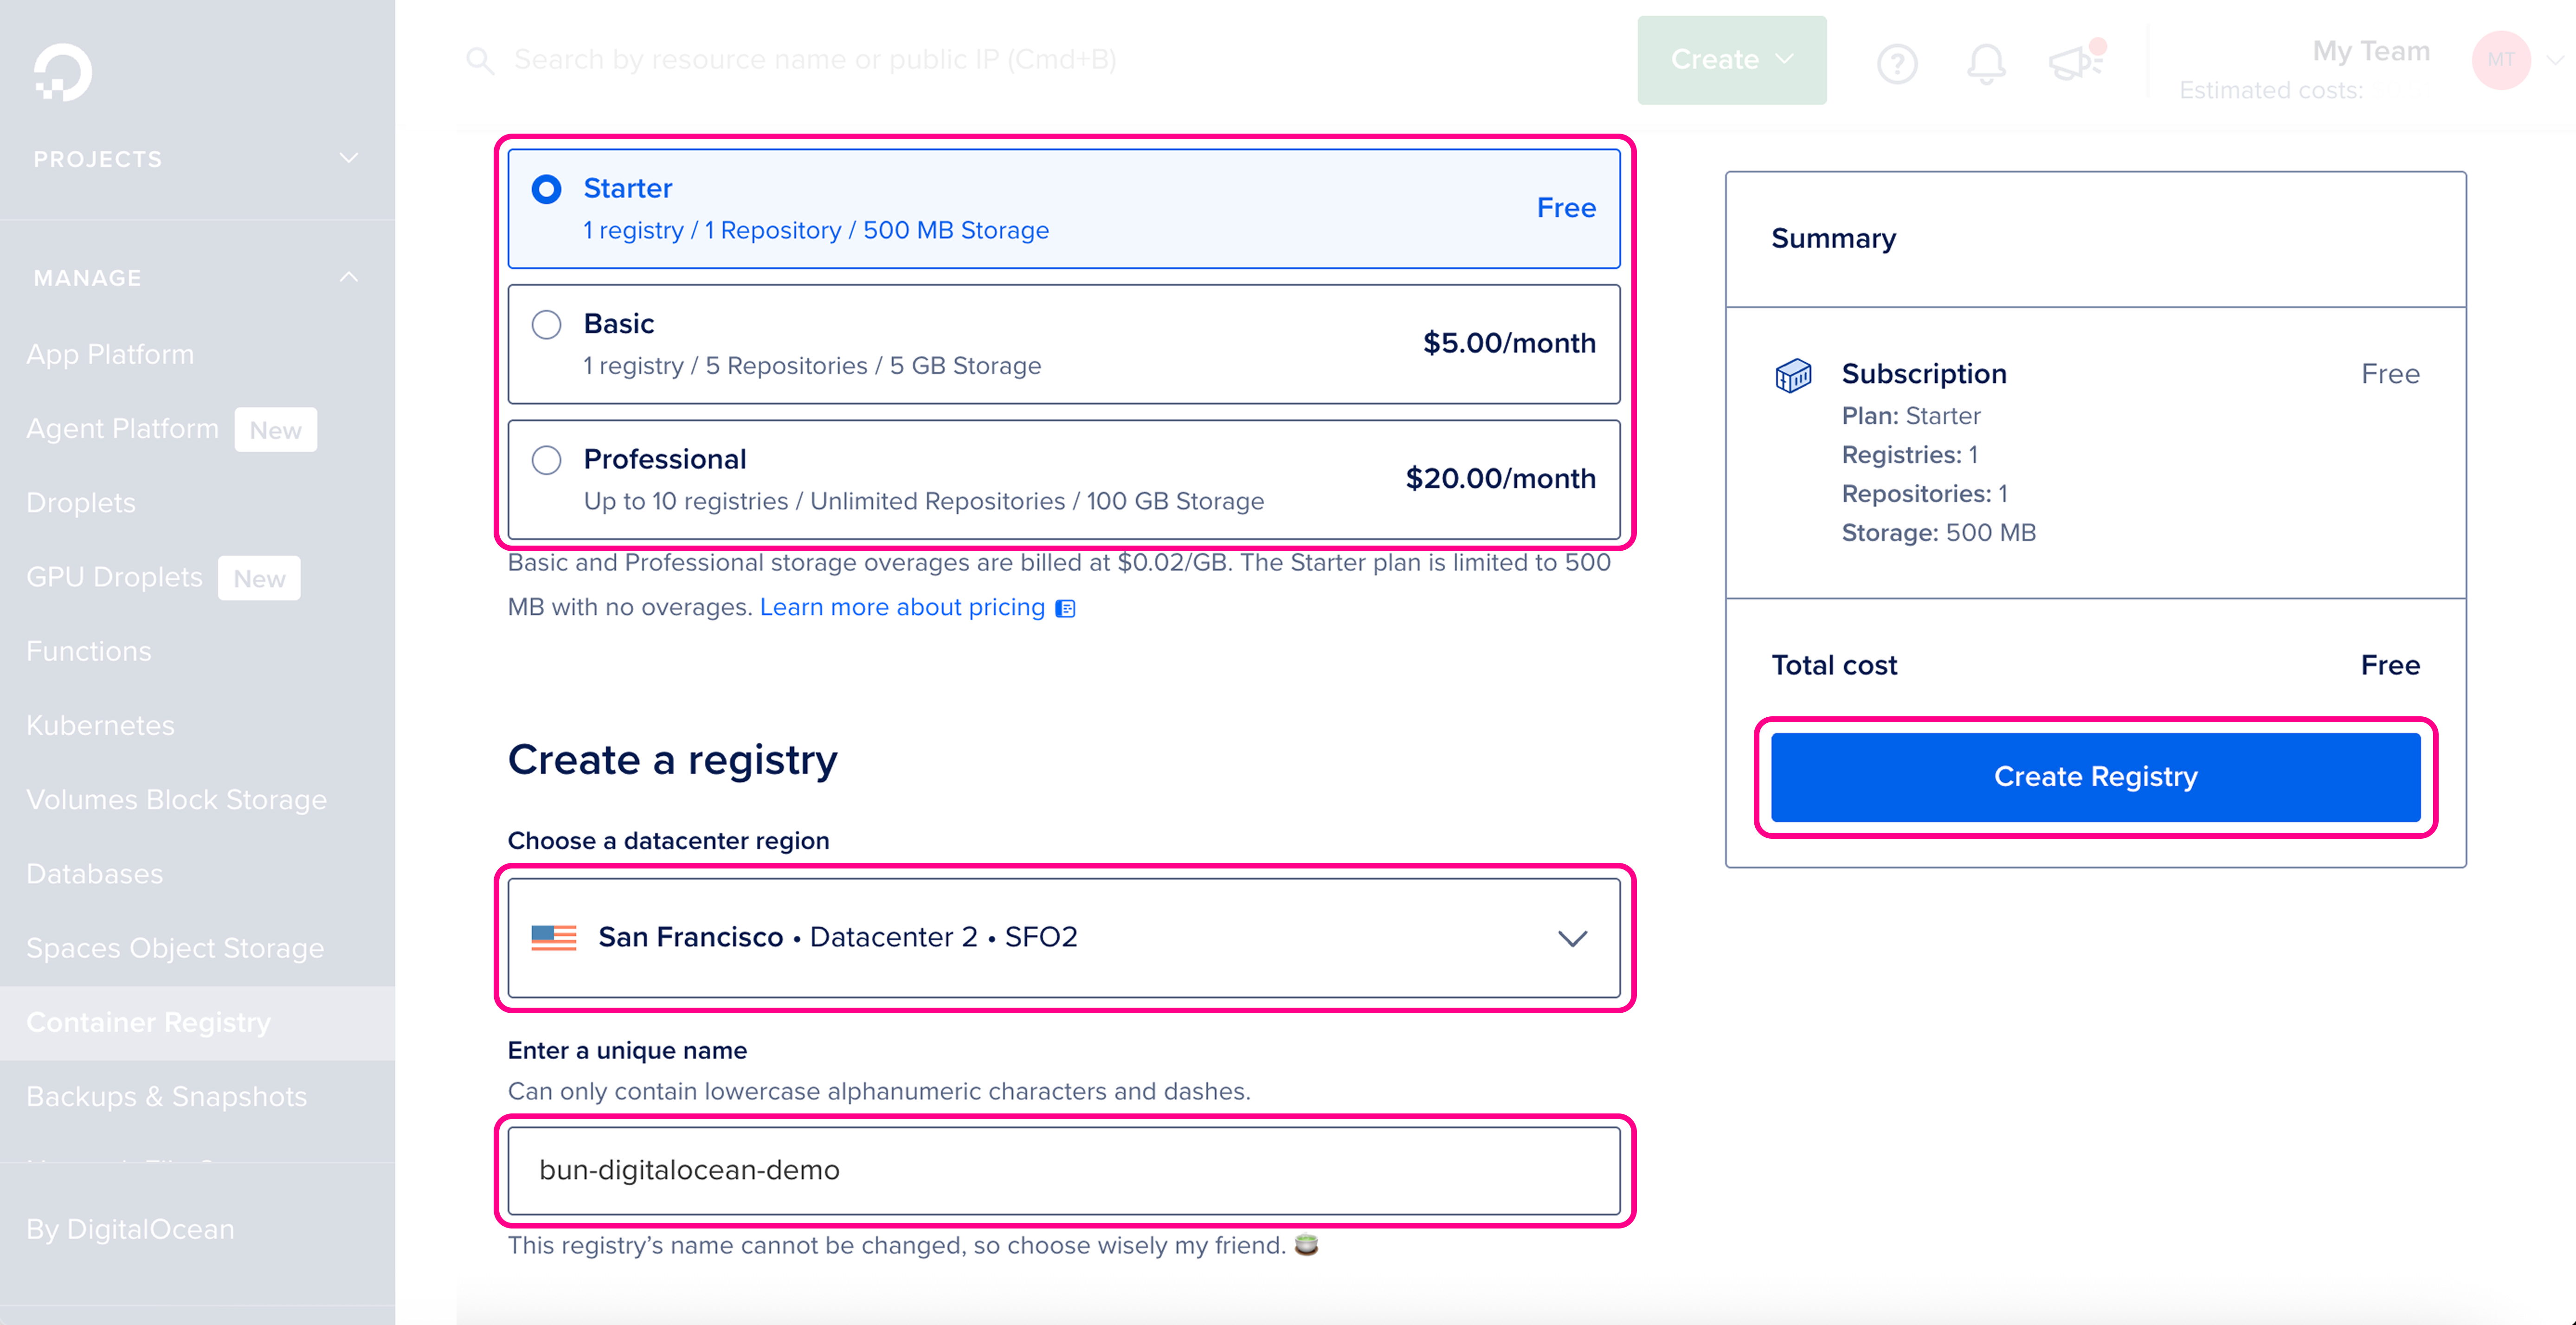
Create a new Dockerfile
Make sure you’re in the directory containing your project, then create a new Create a new
Dockerfile in the root of your project. This file contains the instructions to initialize the container, copy your local project files into it, install dependencies, and start the application.Dockerfile
Make sure that the start command corresponds to your application’s entry point. This can also be
CMD ["bun", "run", "start"] if you have a start script in your package.json.This image installs dependencies and runs your app with Bun inside a container. If your app doesn’t have dependencies, you can omit the RUN bun install --production --frozen-lockfile line..dockerignore file in the root of your project. This file contains the files and directories that should be excluded from the container image, such as node_modules. This makes your builds faster and smaller:.dockerignore
Authenticate Docker with DigitalOcean registry
Before building and pushing the Docker image, authenticate Docker with the DigitalOcean Container Registry:
terminal
This command authenticates Docker with DigitalOcean’s registry using your DigitalOcean credentials. Without this step, the build and push command will fail with a 401 authentication error.
Build and push the Docker image to the DigitalOcean registry
Make sure you’re in the directory containing your Once the image is pushed, you should see it in the DigitalOcean registry dashboard: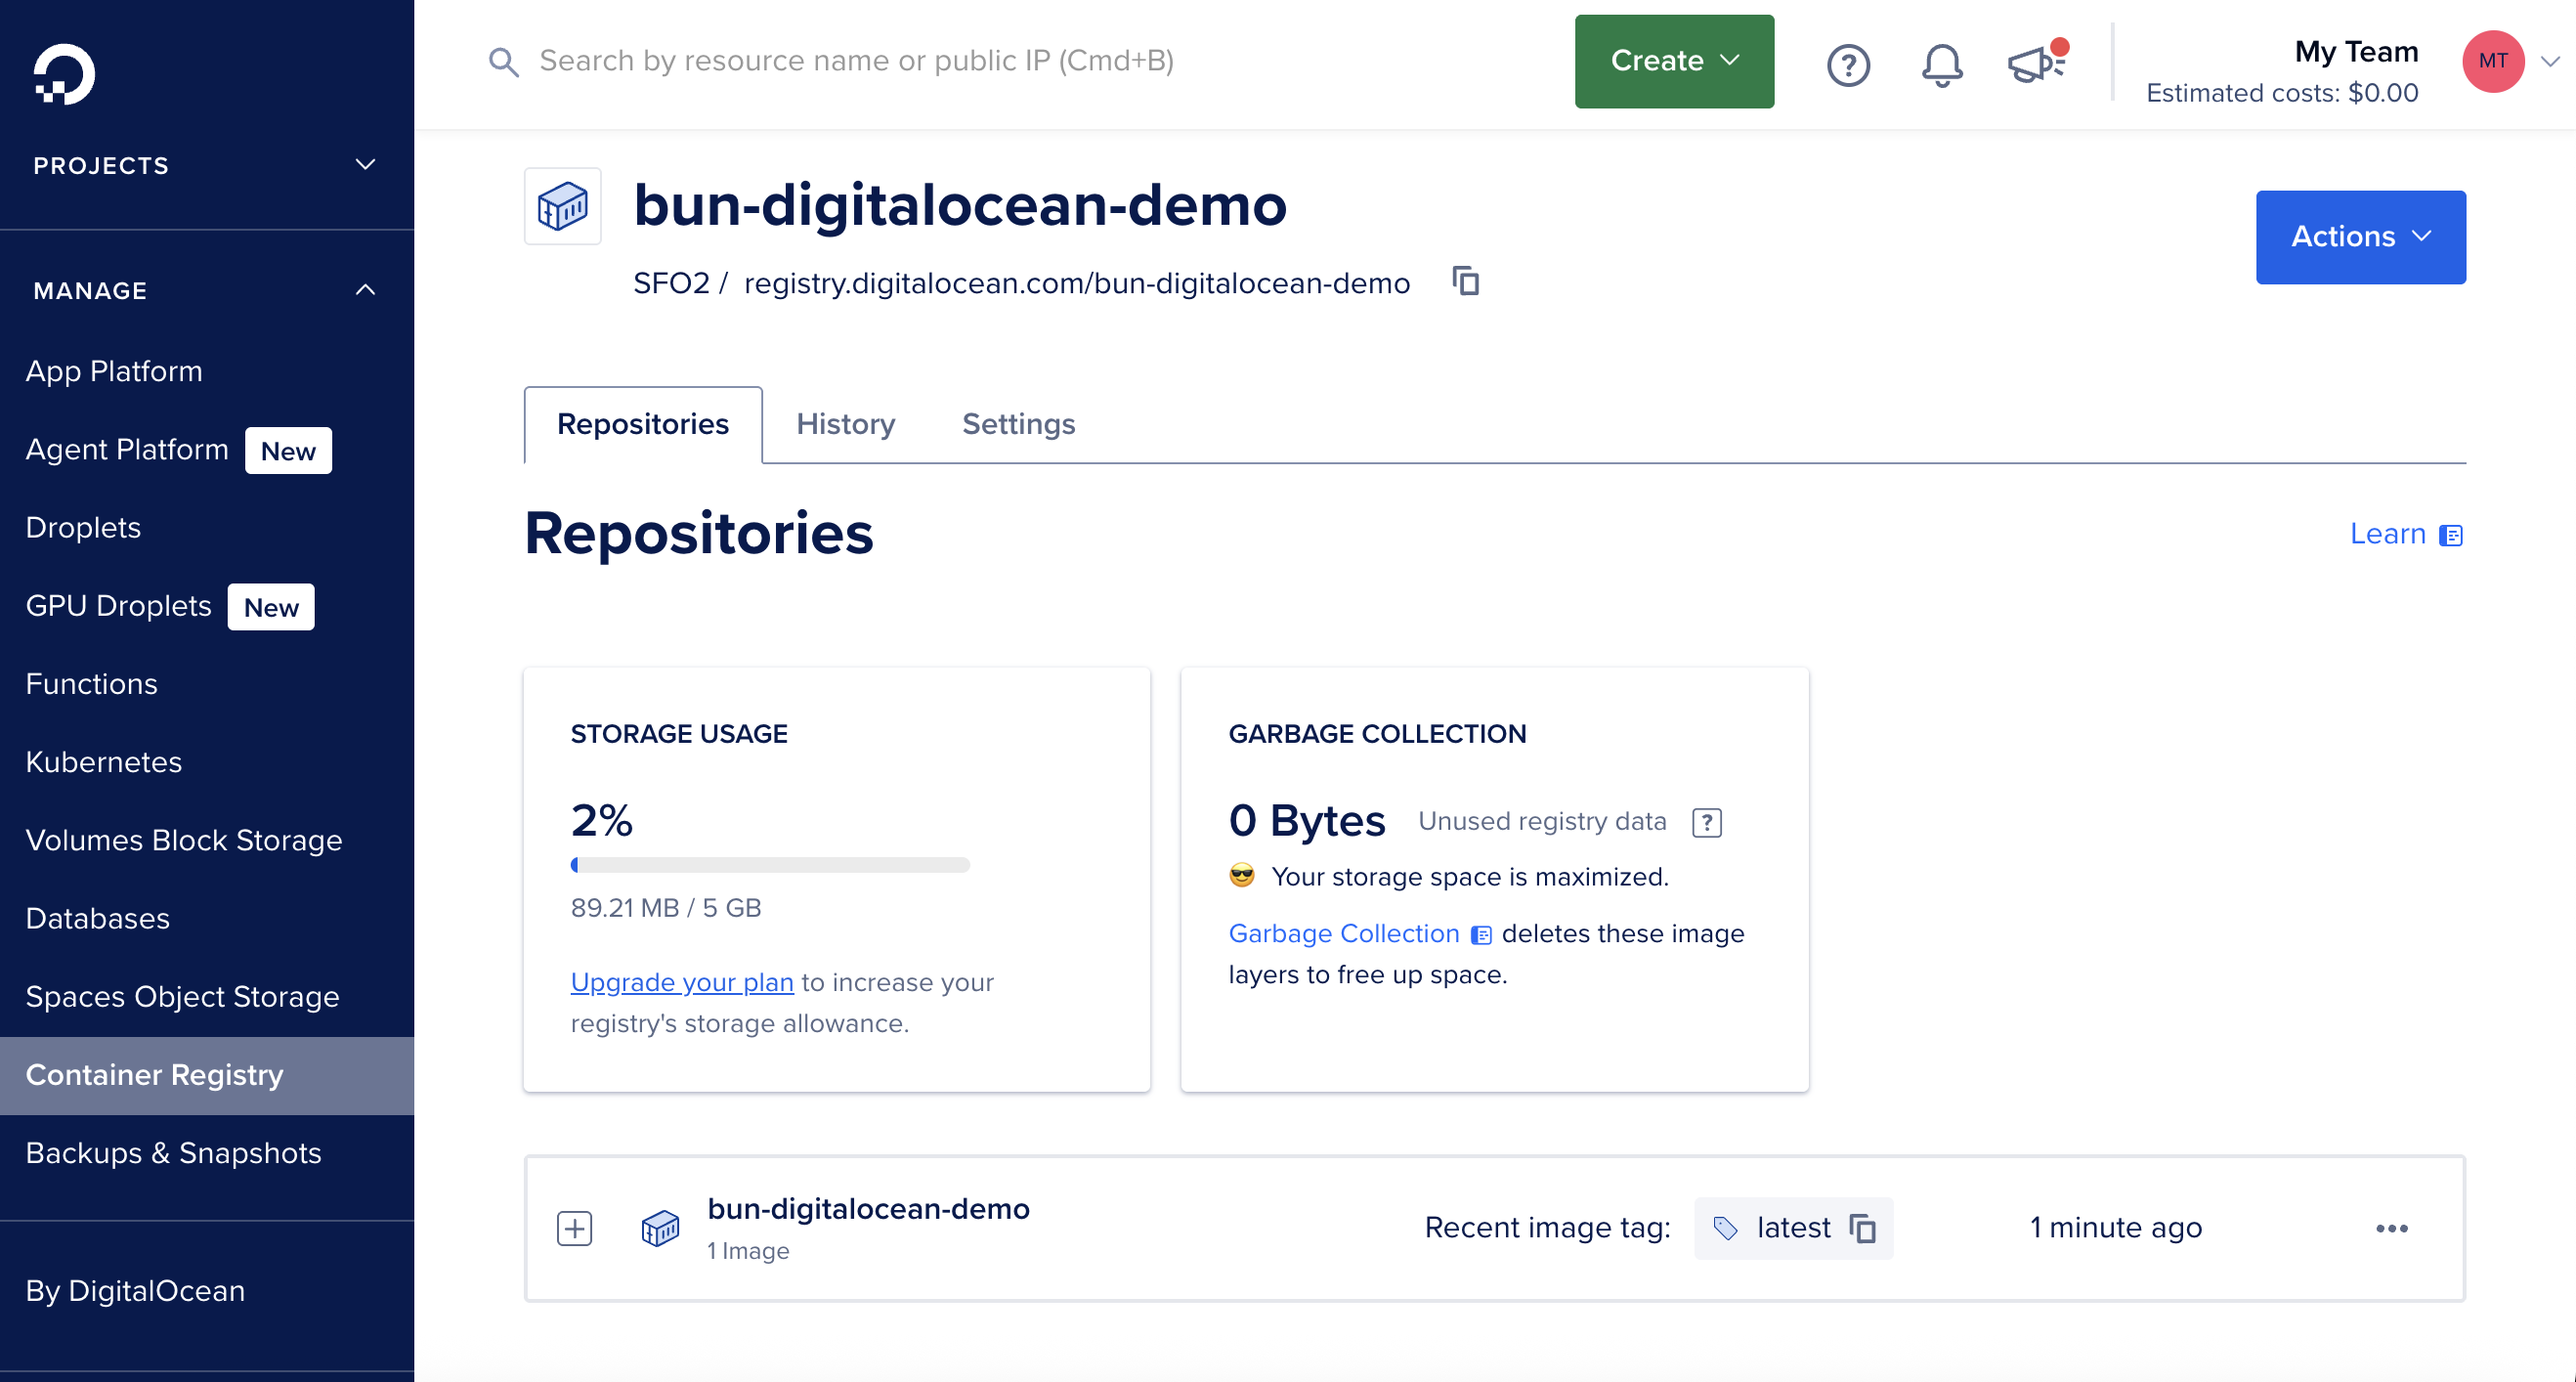
Dockerfile, then build and push the Docker image to the DigitalOcean registry in one command:terminal
If you’re building on an ARM Mac (M1/M2), you must use
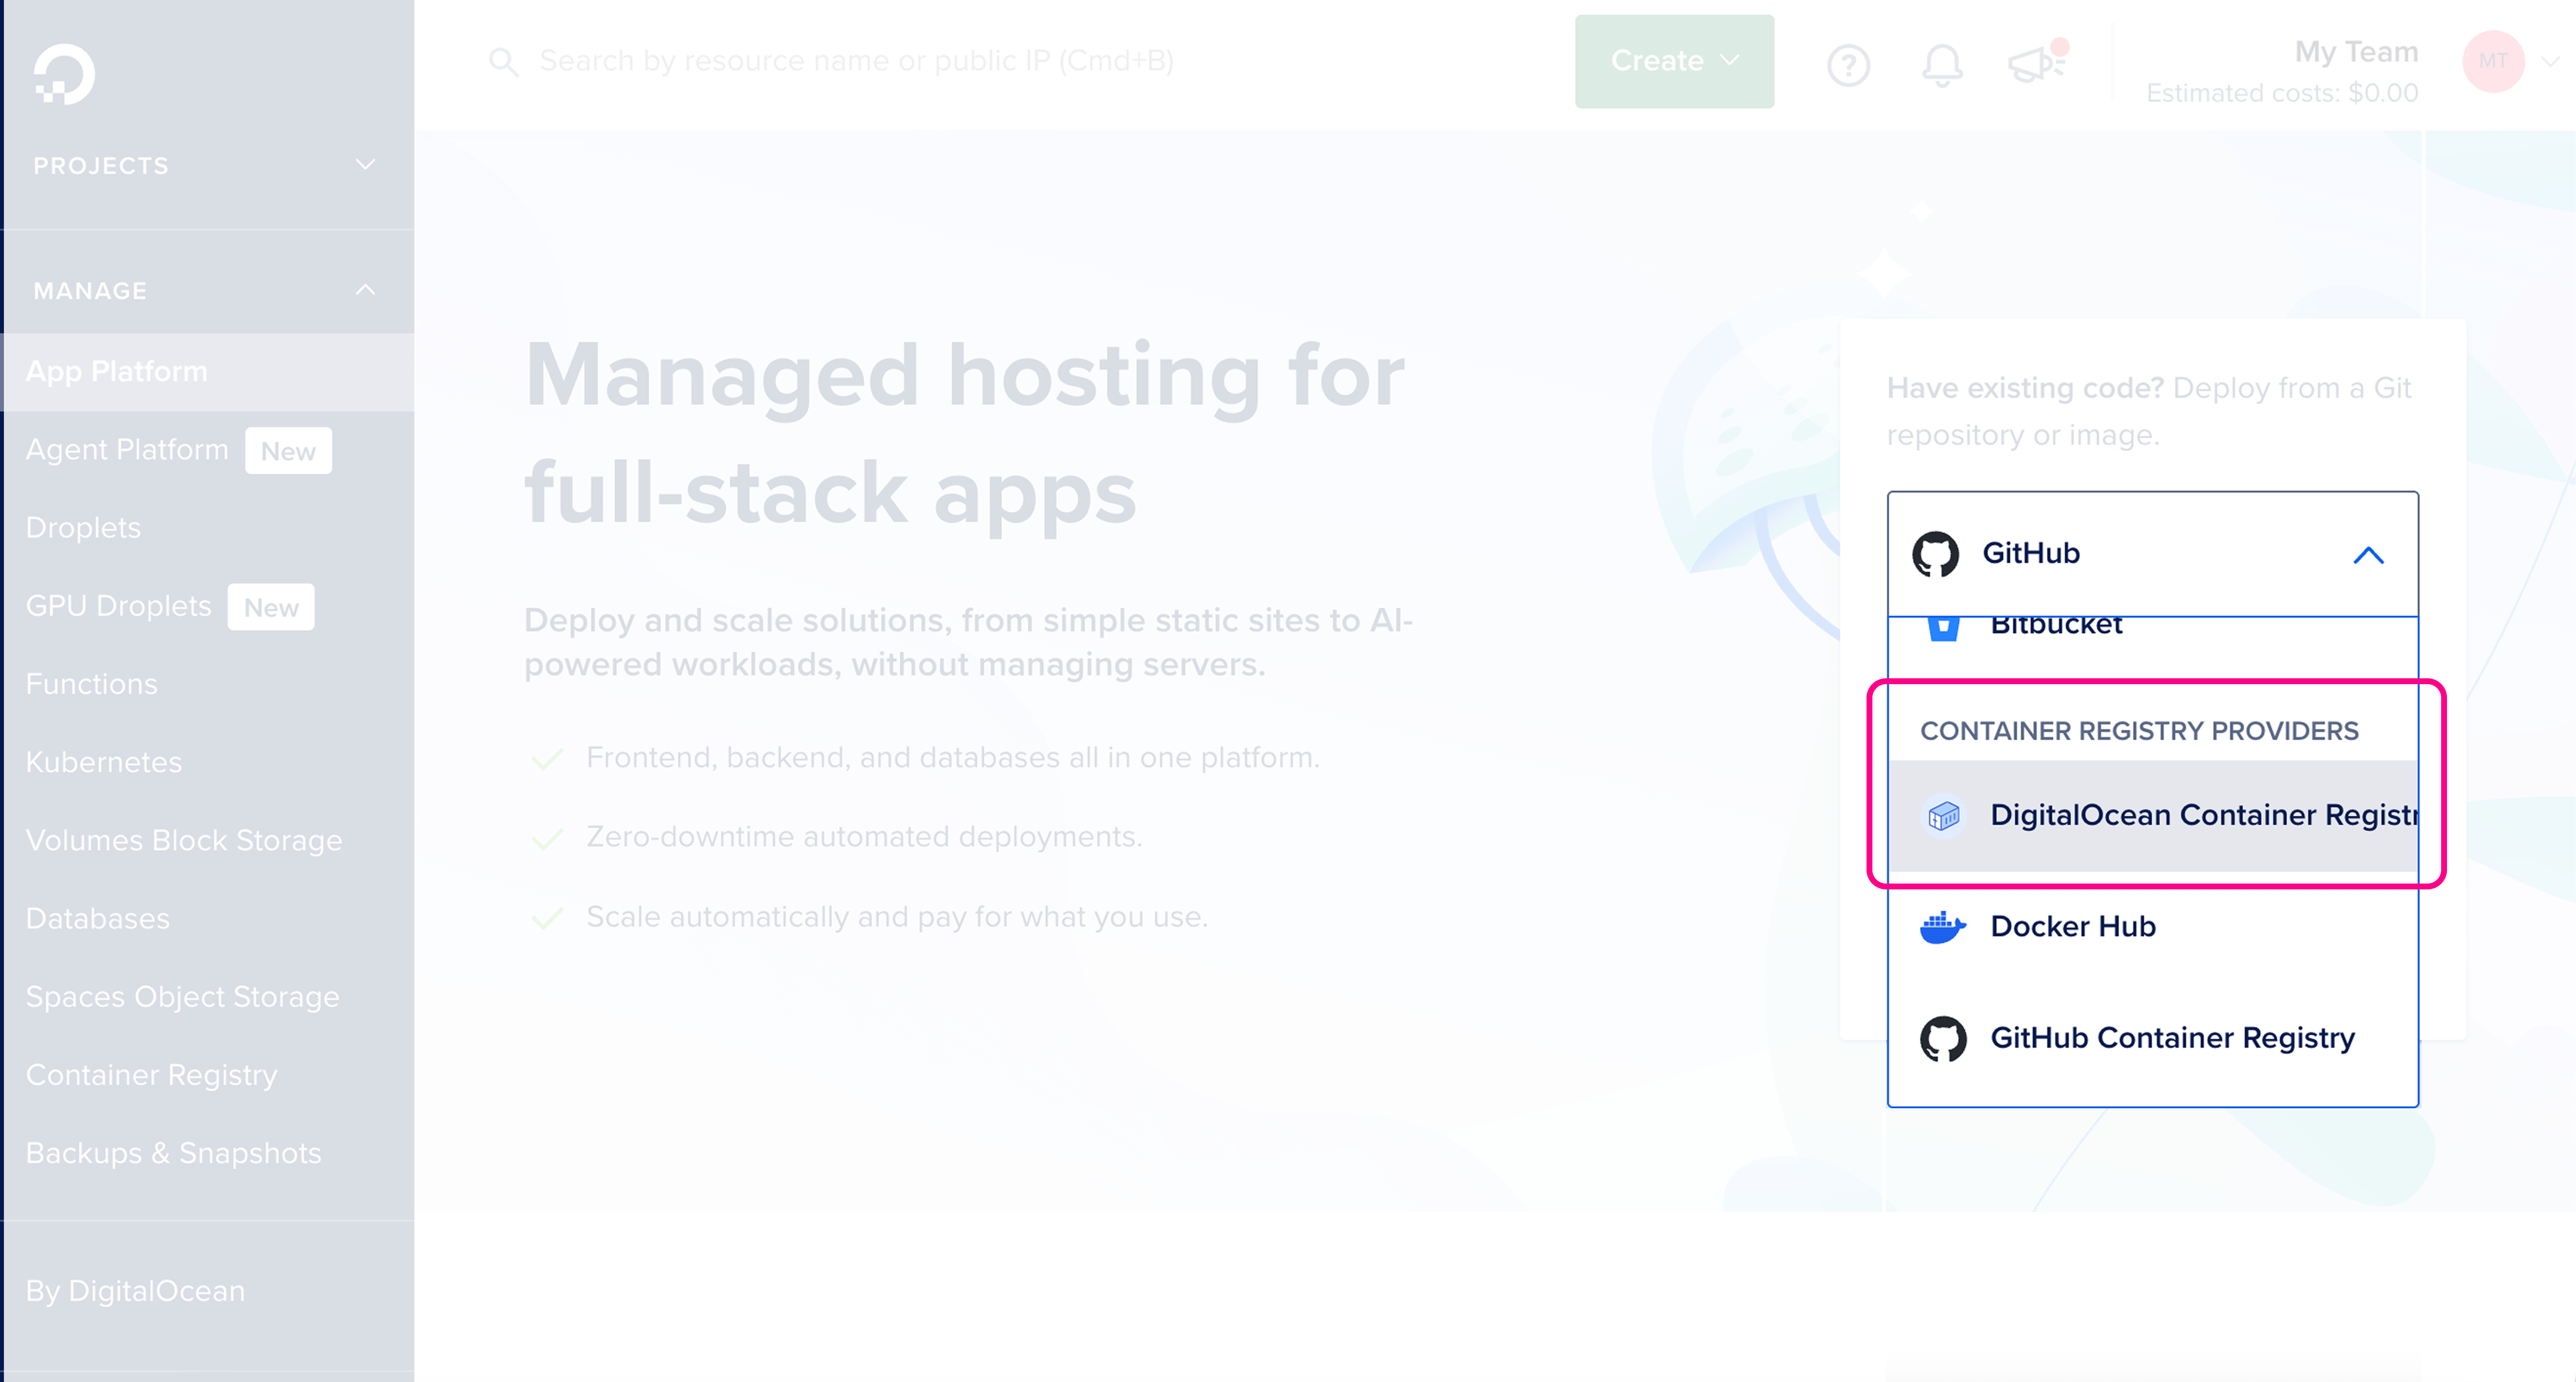
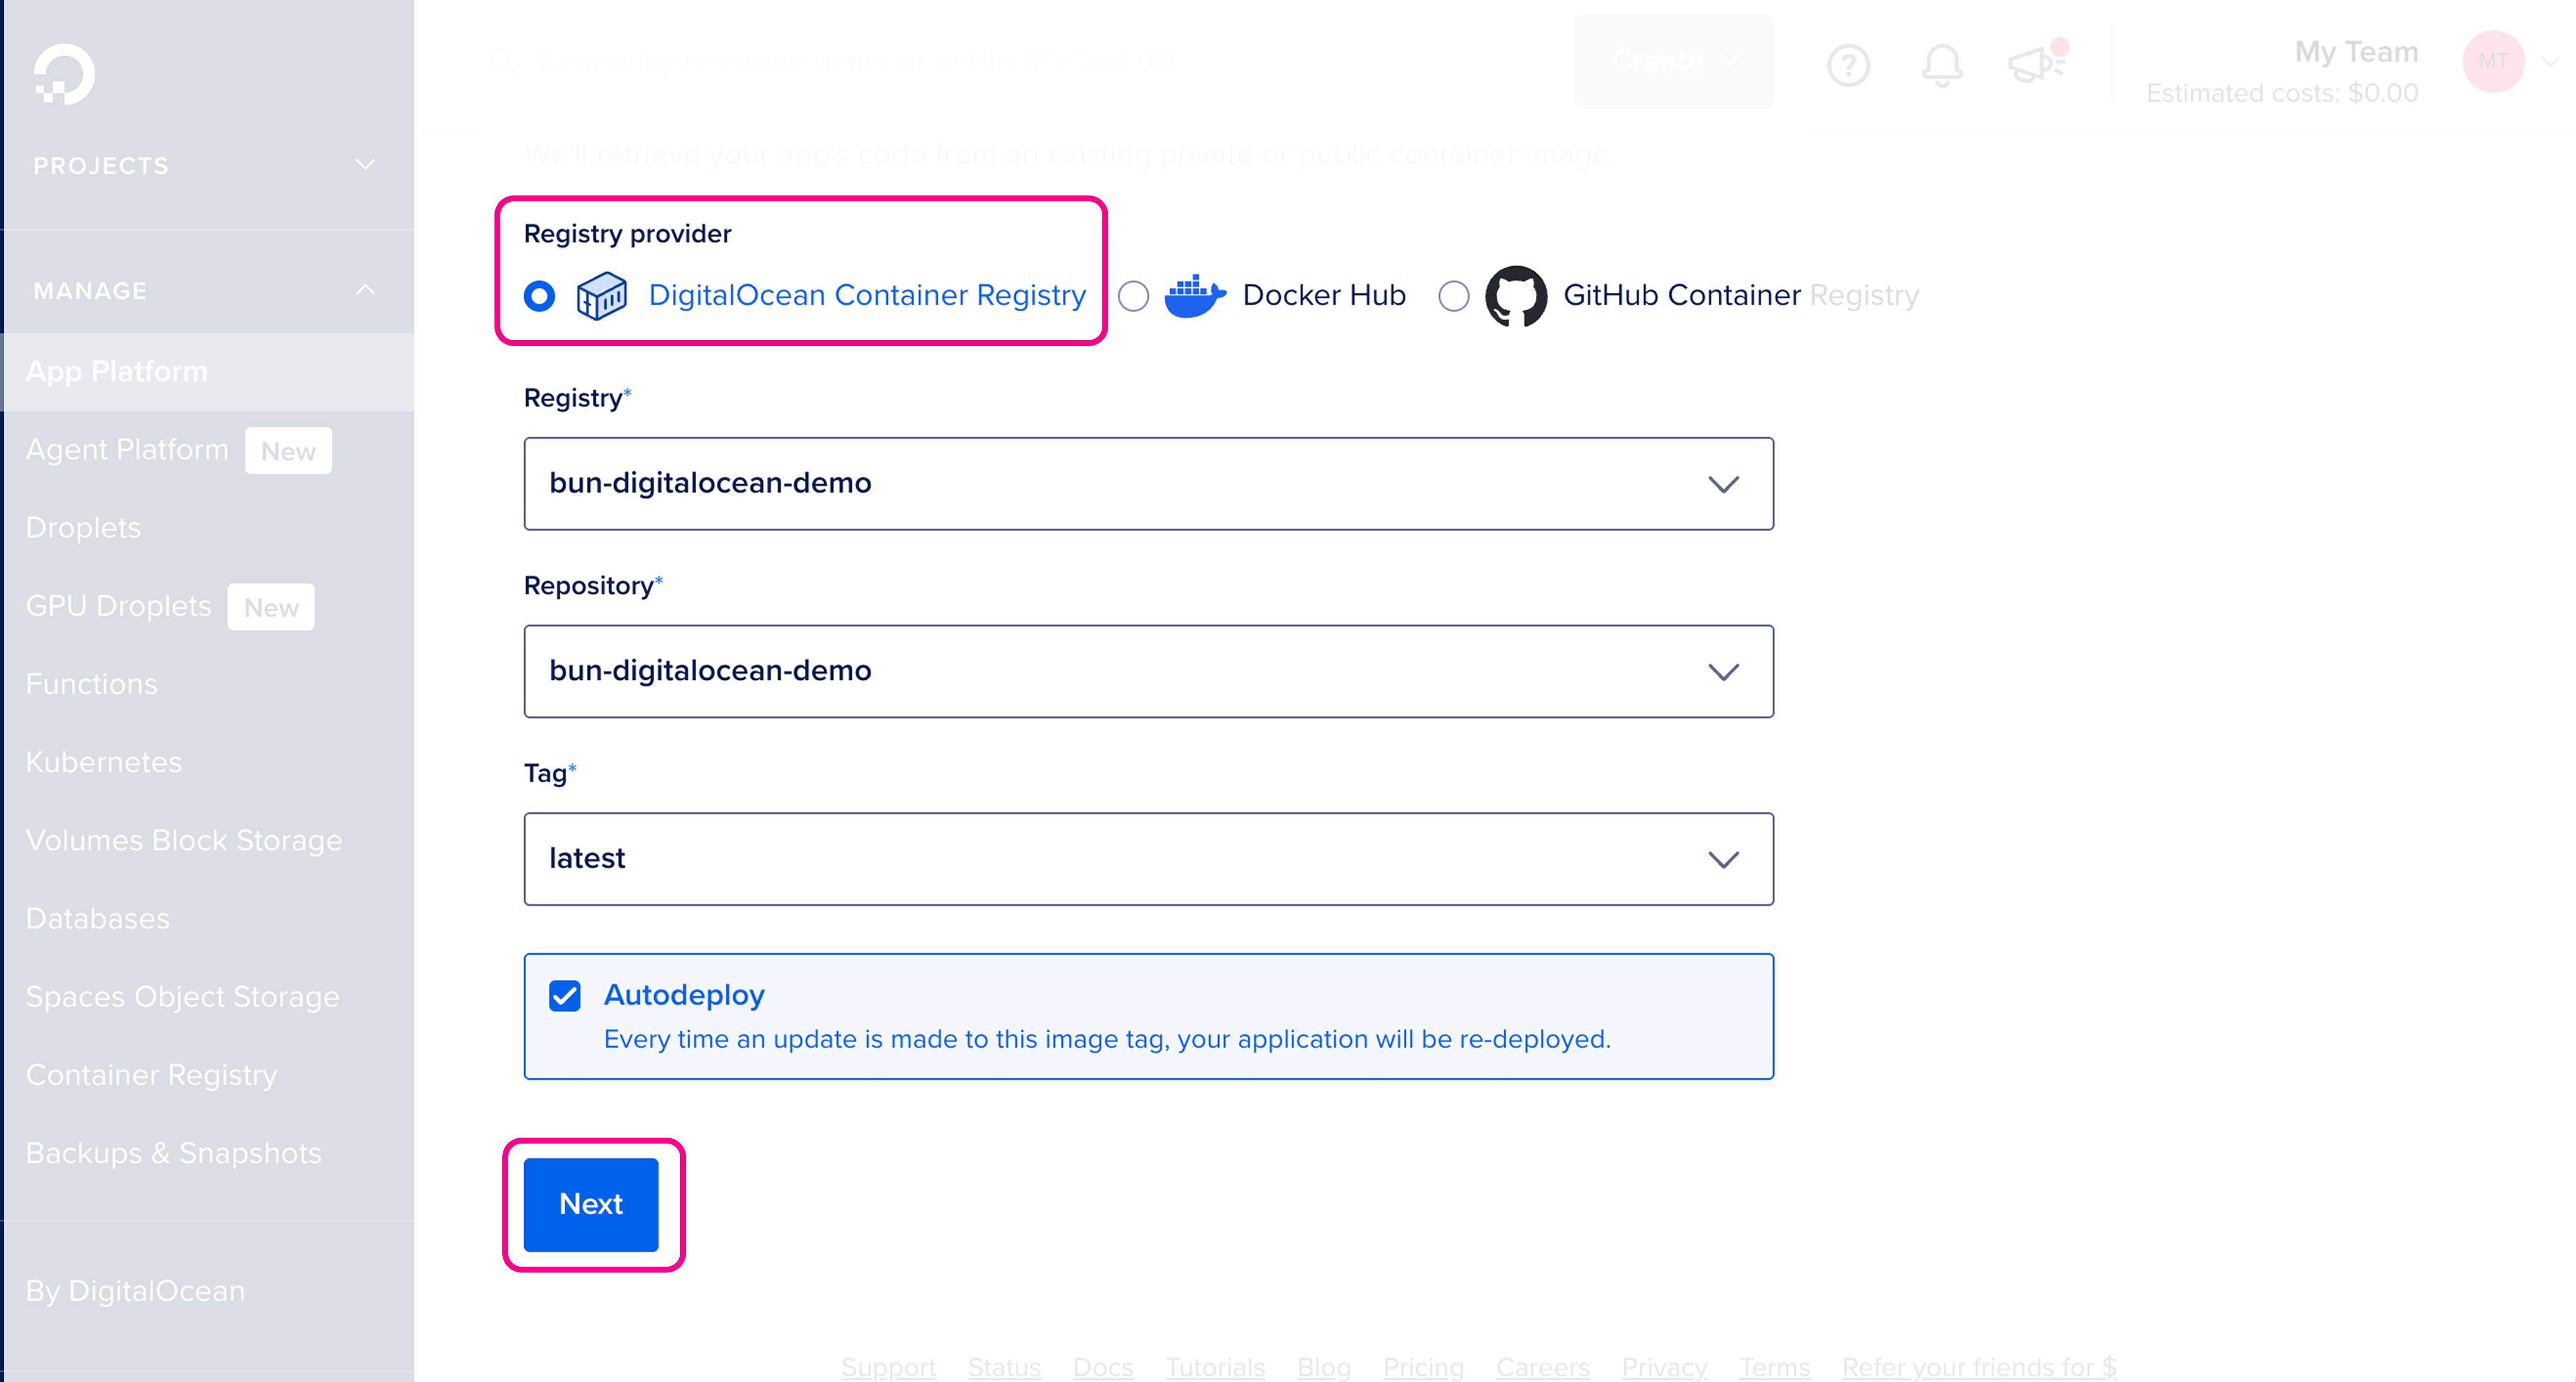
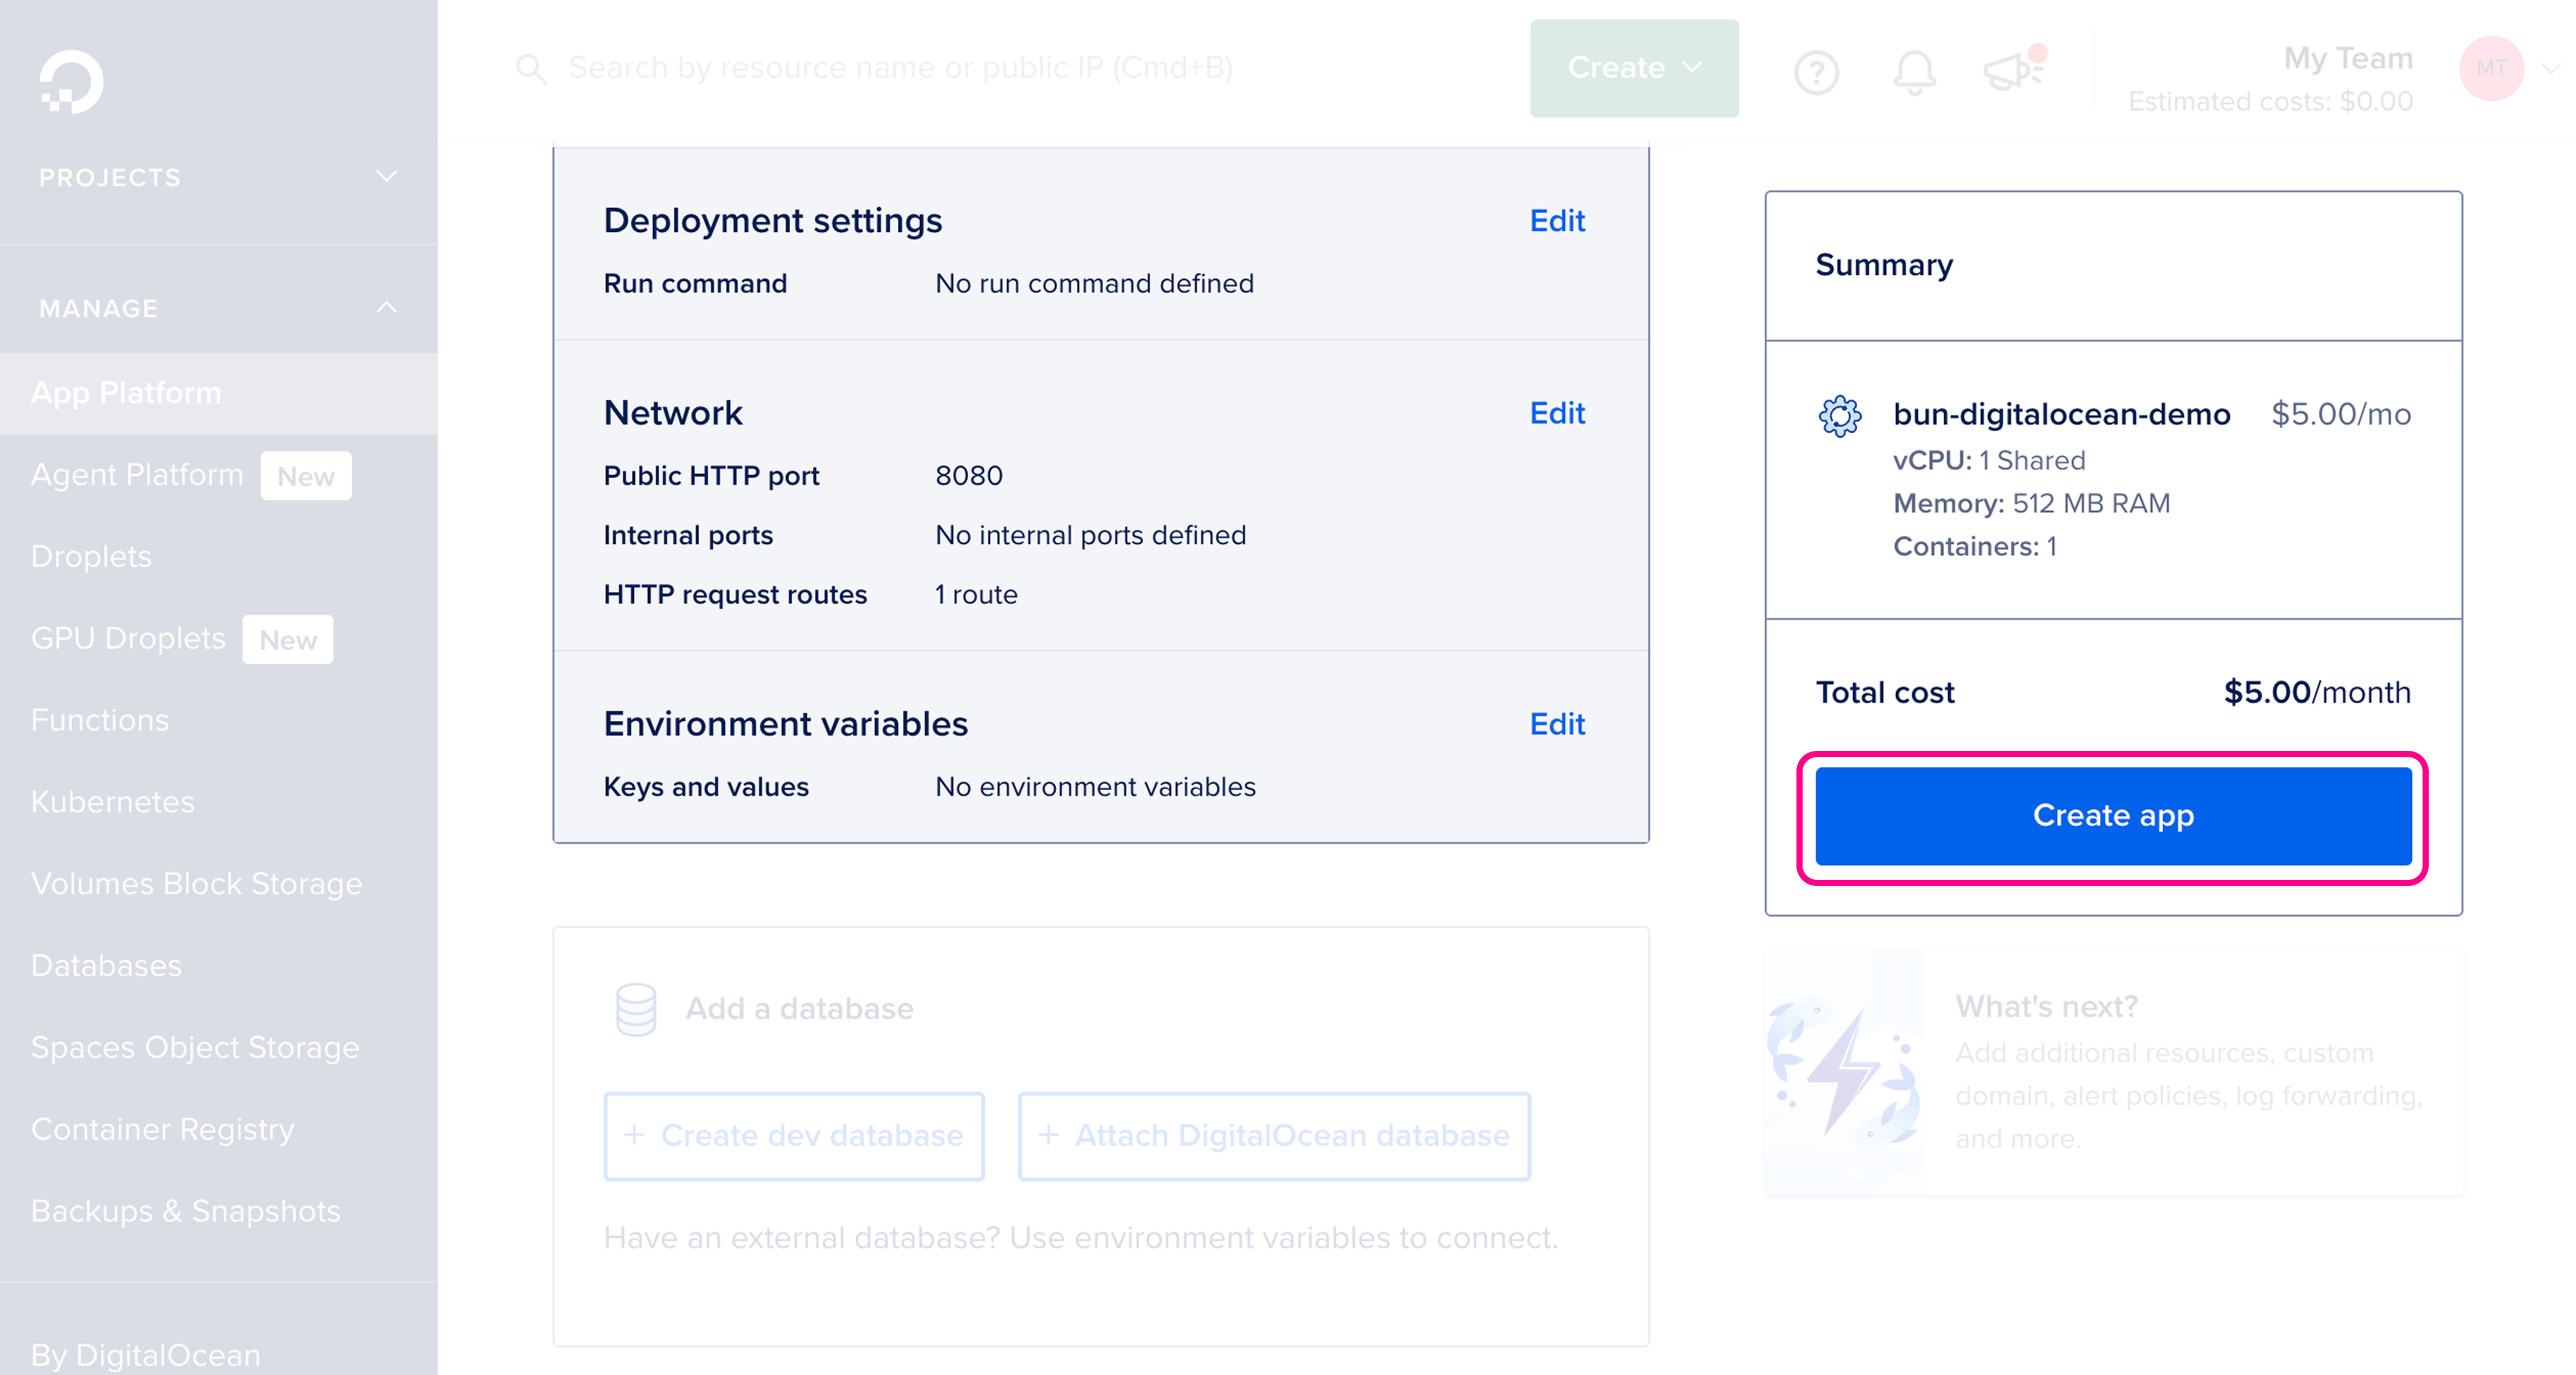
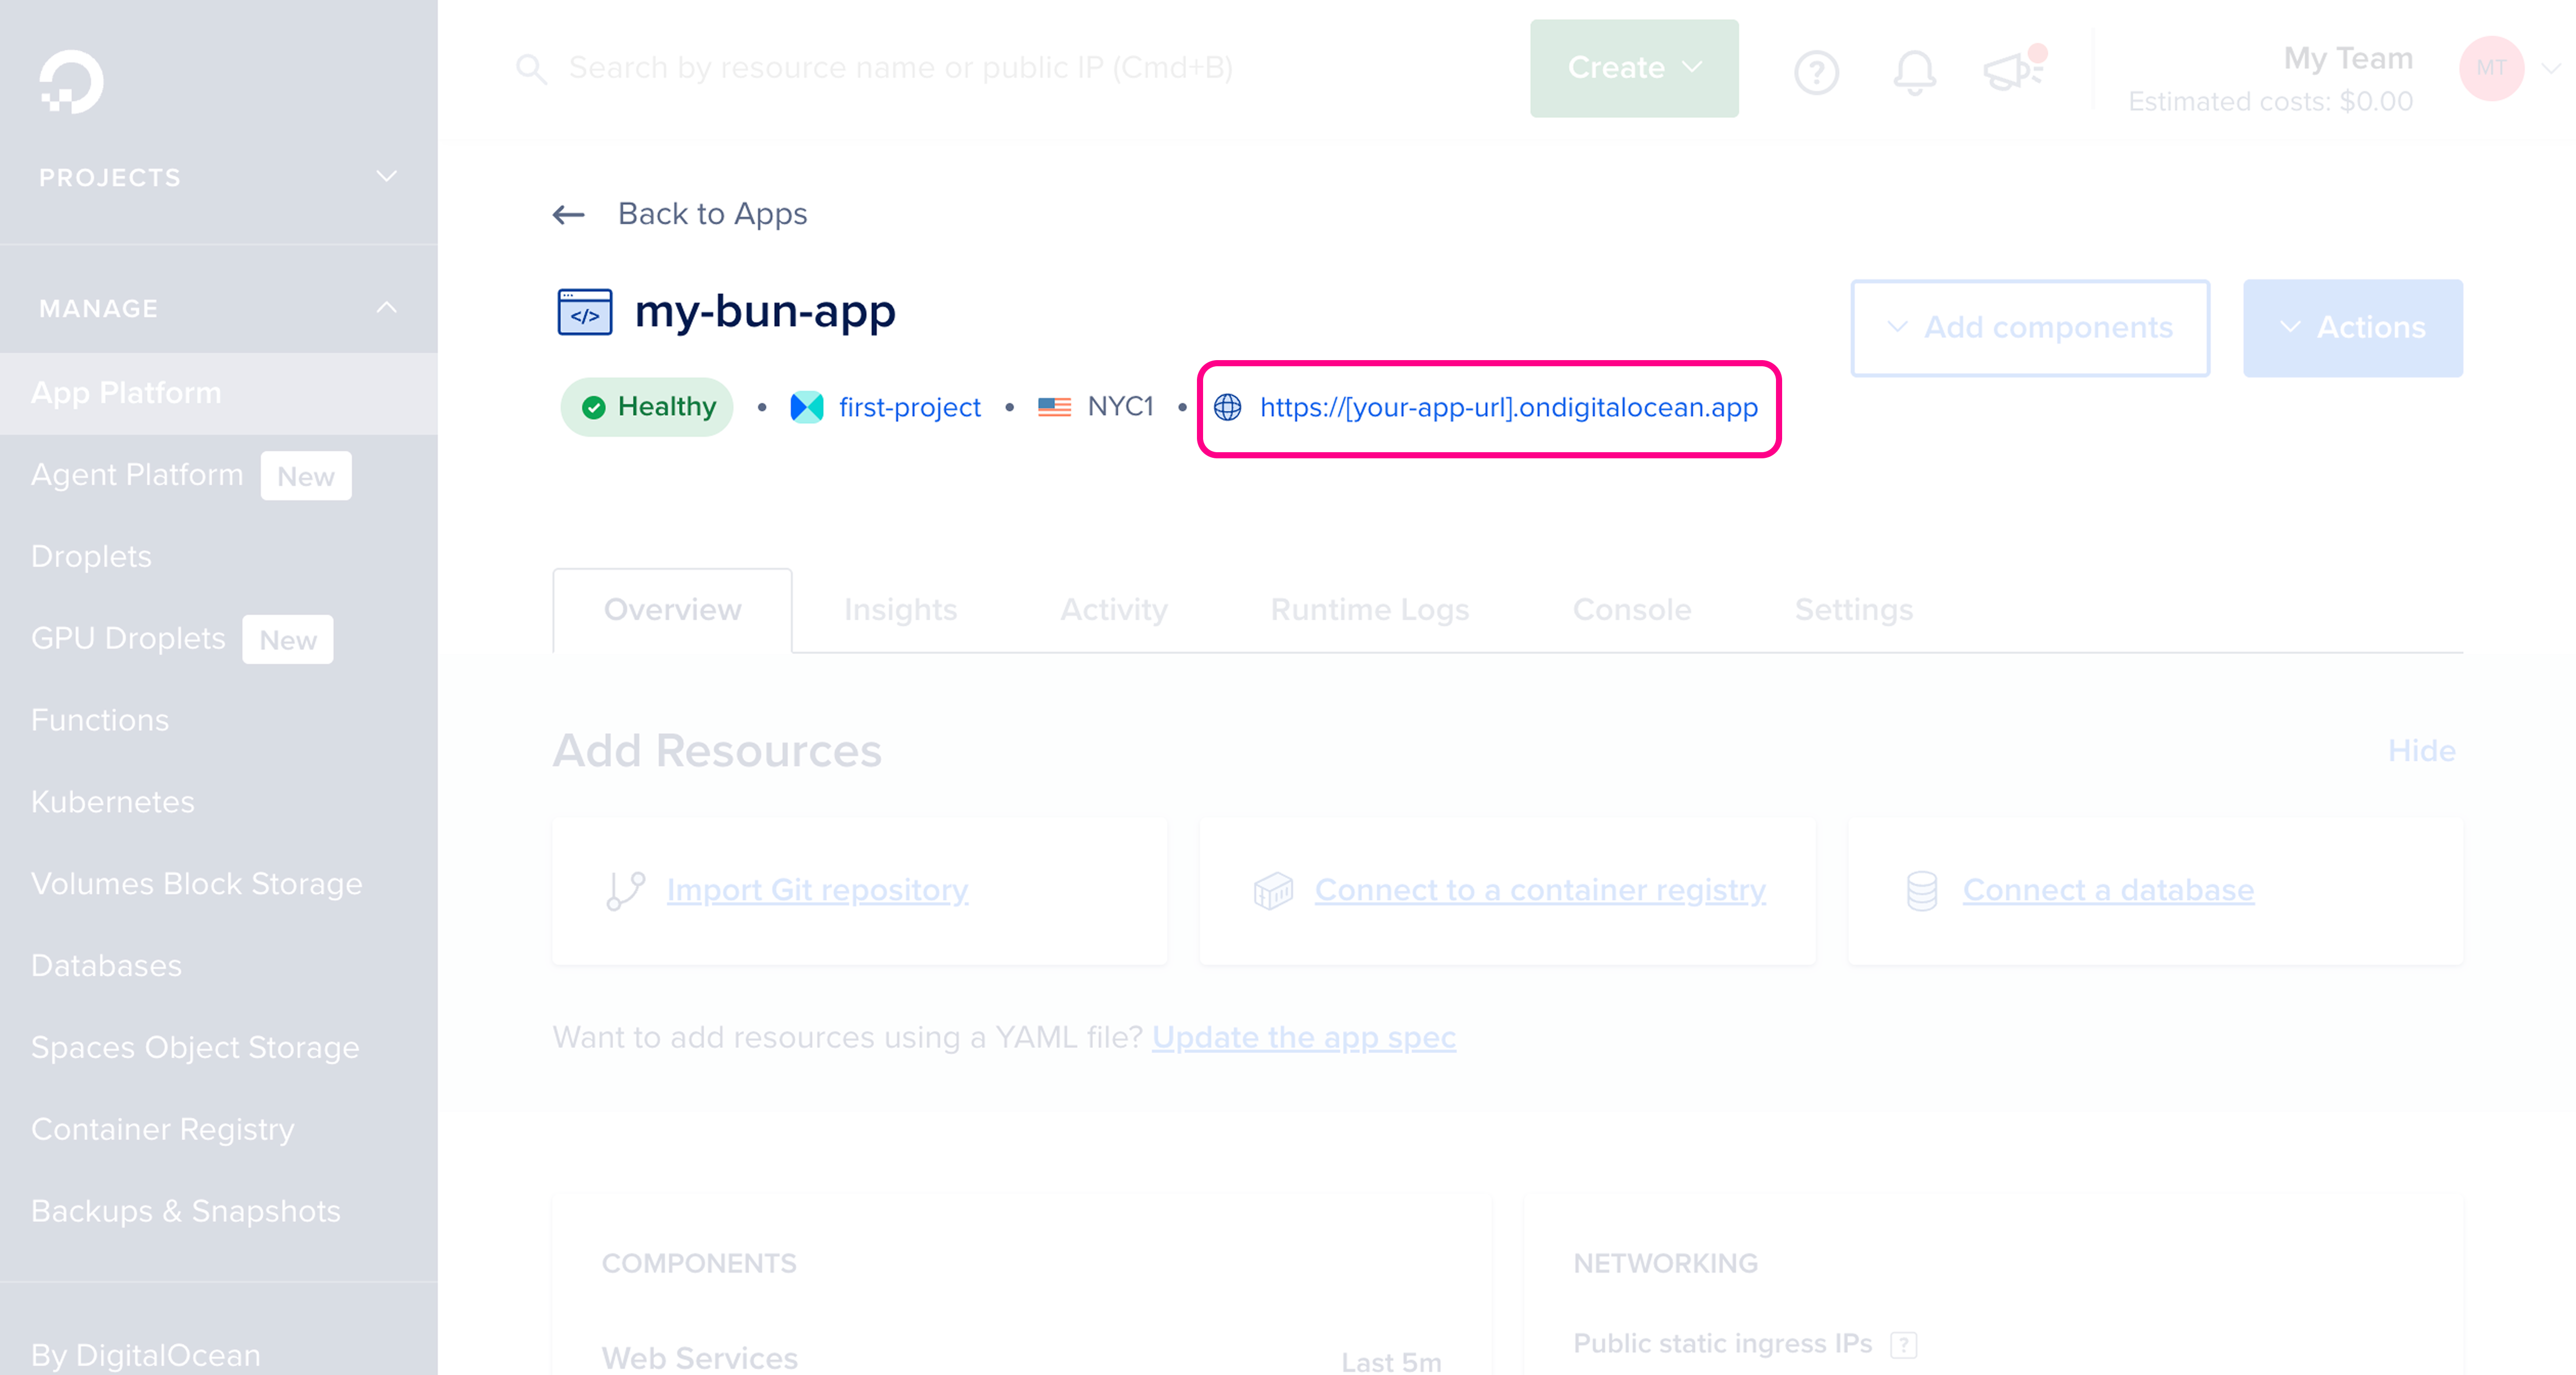
docker buildx with --platform=linux/amd64 to ensure compatibility with DigitalOcean’s infrastructure. Using docker build without the platform flag will create an ARM64 image that won’t run on DigitalOcean.Create a new DigitalOcean App Platform project
In the DigitalOcean dashboard, go to App Platform > Create App. We can create a project directly from the container image.